
Back to: Cricut & Etsy
CUTTING:
Once you click the “Make” button, Cricut Design Space will show you a preview of your design. Here you can also arrange the design on your digital mat. Then click “Continue”.
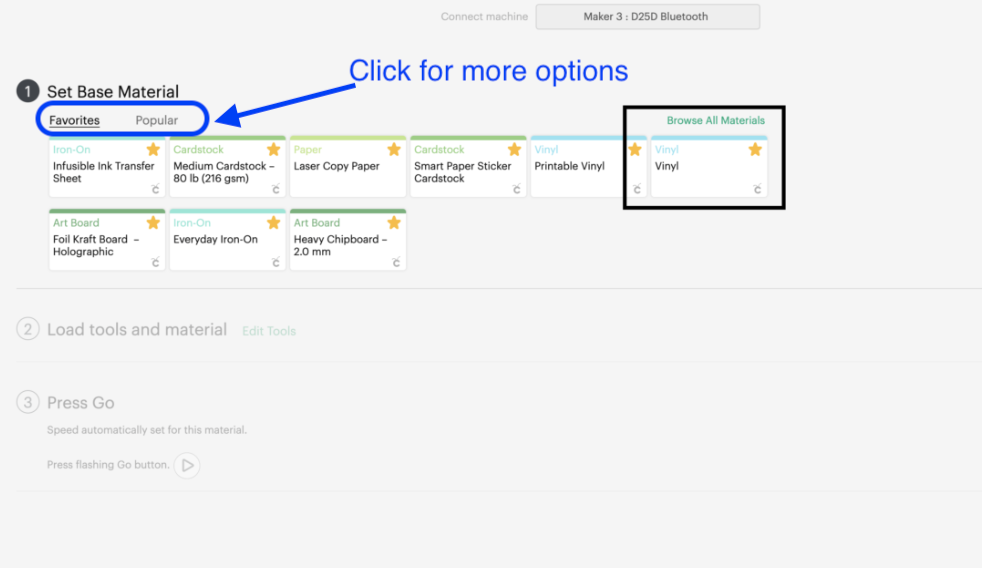
Next you will have to select your settings. Choose the exact type of vinyl you are using from the Materials Menu e.g “Glitter Vinyl, Printable Vinyl.” If the vinyl you are using is listed in the Favorites Tab click on the Popular Tab and search for the type.
If you are using an earlier Cricut Explore machine (Cricut Explore or Cricut Explore Air 2), set your machine’s dial to “Vinyl.”
SETTINGS
For the cut pressure you can leave it at the default setting. However if your vinyl doesn’t pull away effortlessly when weeding, you need more pressure. If your machine cuts through both the vinyl and the paper backing, you need less pressure. Adjustments can be made on the final cut screen via a dropdown menu that has pressure options for Less, Default, and More.
WEEDING
Weeding is the removal of the negative space around a cut image.
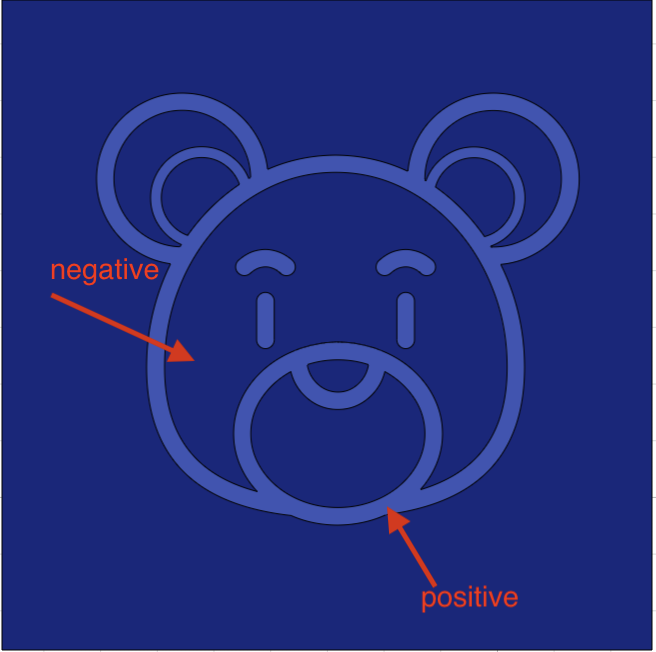
A weeder is a sharp angular tool that helps remove the negative pieces from your design. Fine tweezers can be used as well
TRANSFER TAPE
Once your design is weeded, you will need a “carrier” for your design. This is where transfer tape comes in.
Transfer tape (sometimes referred to as transfer paper)ensures that you can transfer the cut vinyl in exactly the same placement as it appears on the vinyl backer.
To use transfer tape, cut out a piece big enough to cover your design. Remove the backing and place the sticky side to your vinyl. Using the scraper to smooth out any bubbles and to barnish the vinyl to the tape.
Once your surface is ready for the vinyl to be applied, remove the vinyl backing. Then carry the transfer tape to the surface and use the scraper to barnish the vinyl design to the surface. At 45 degrees slowly remove the transfer tape leaving the vinyl pieces in place on your finished project!.
For curved surfaces, cut slits into the transfer tape. This will help to get things to lay smoothly and avoid air bubbles even if it’s not a flat surface.
REVERSE WEEDING:
Reverse weeding is a method of weeding out excess cut vinyl from around a vinyl decal. This method is helpful for small, intricate cuts. You would weed on the transfer tape instead of the vinyl backing. Skip to 1:03.
SURFACE PREP:
For the vinyl to adhere to your surface make sure you have cleaned the surface. I would recommend alcohol wipes or Windex. After cleaning and before applying your design make sure the surface is dry as well.
