
Back to: Cricut & Etsy
Installation
- Open an internet browser and go to design.cricut.com.
- Pick either Windows or Mac if you are installing it on a desktop. If not, pick iOS or Android.
- Select the checkbox to agree to Cricut Terms of Use and Privacy Policy, and select Download.
- When the download is complete, double-click the file in the browser or in your Downloads folder.
- If a window opens to ask if you trust the application, select the option to trust the application.
- A setup window displays installation progress.
- Create an account using an email. This prompts you to create a Cricut ID and password which you can sign in on any computer with Cricut Design Space.
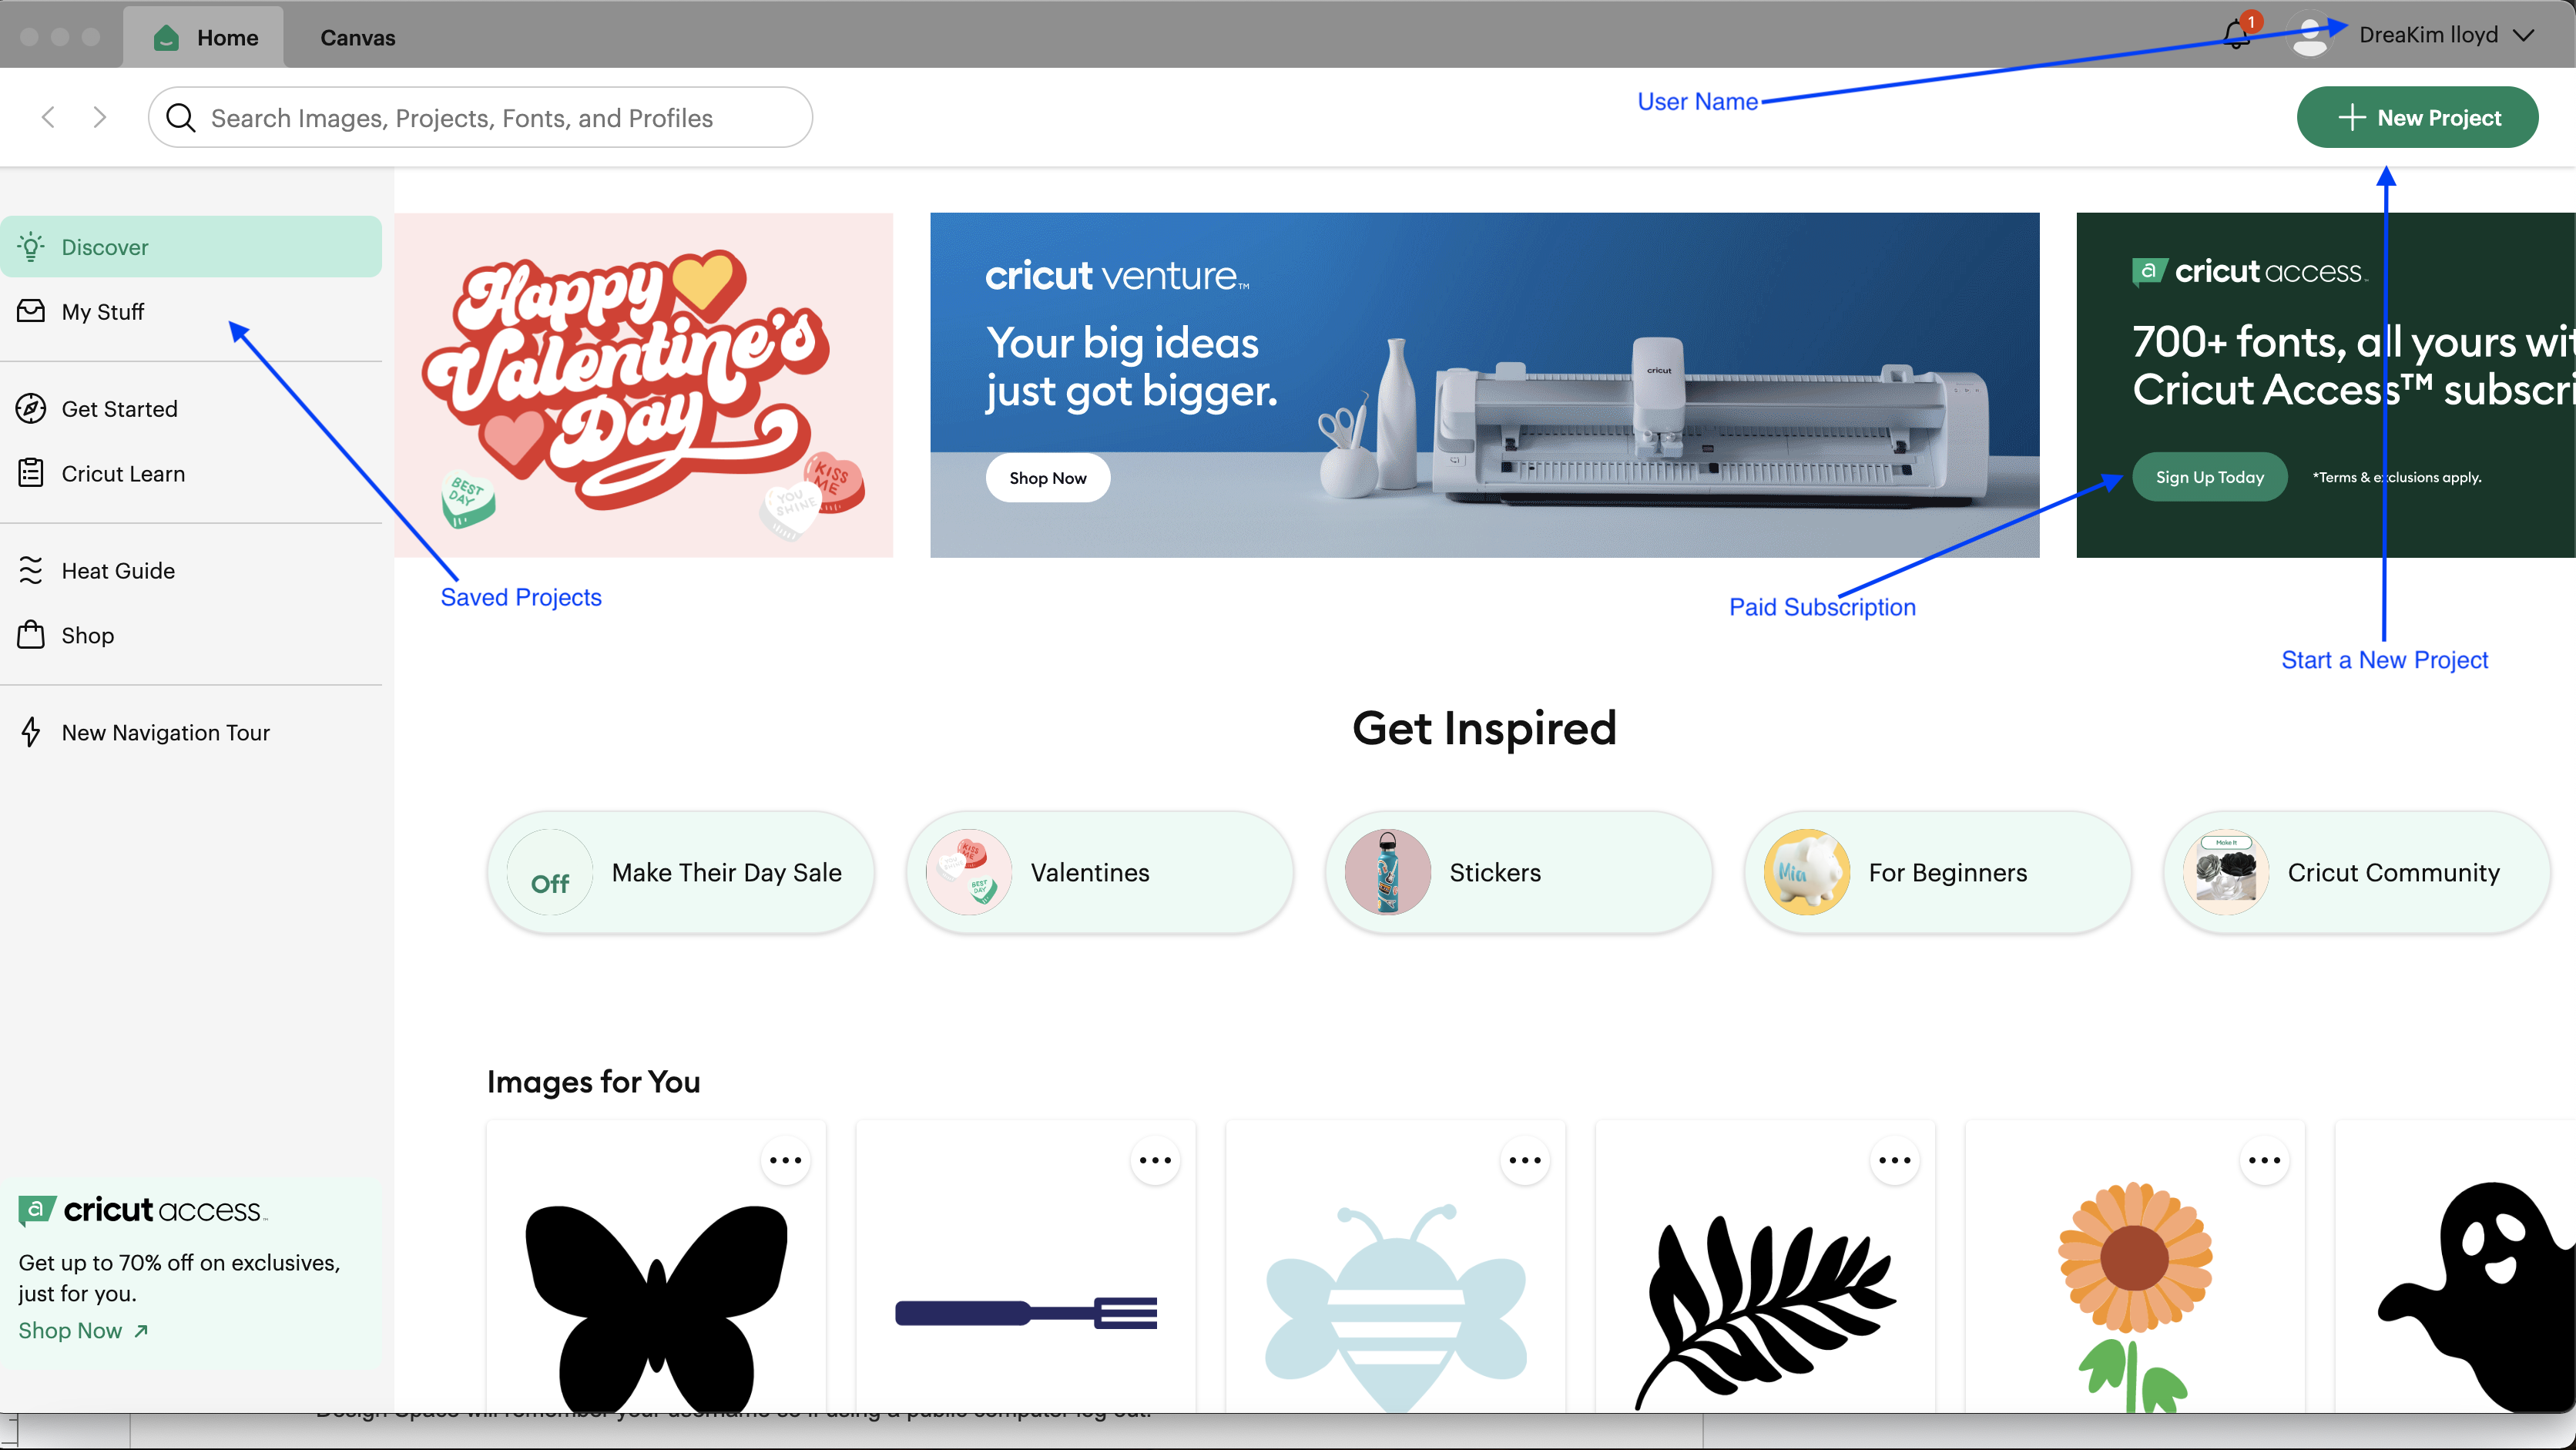
Starting Design Space
In the top right corner there is the + New Project button. Click it to start your new project. If you have a project on the go then you can find it in the My Stuff button located on the left.
The Workspace
On the left of the workspace, there will be a list of tabs.

- NEW
- TEMPLATE
- PROJECTS
- SHAPES
- IMAGES
- TEXT
- PHRASERS
- EDIBLE
- UPLOAD
- MONOGRAM
These will open different menus so that you can bring in various items to design.
We will mainly focus on SHAPES; IMAGES and TEXT in the sections. Along the top of your workspace there will be various commands that are grayed out.That is because your workspace is empty. Let’s fix that! On the left side, click the tab SHAPES and add a circle.
Play around with editing the circle: Try changing the colour and resizing.
Let’s add another shape! Repeat the process and grab another shape.
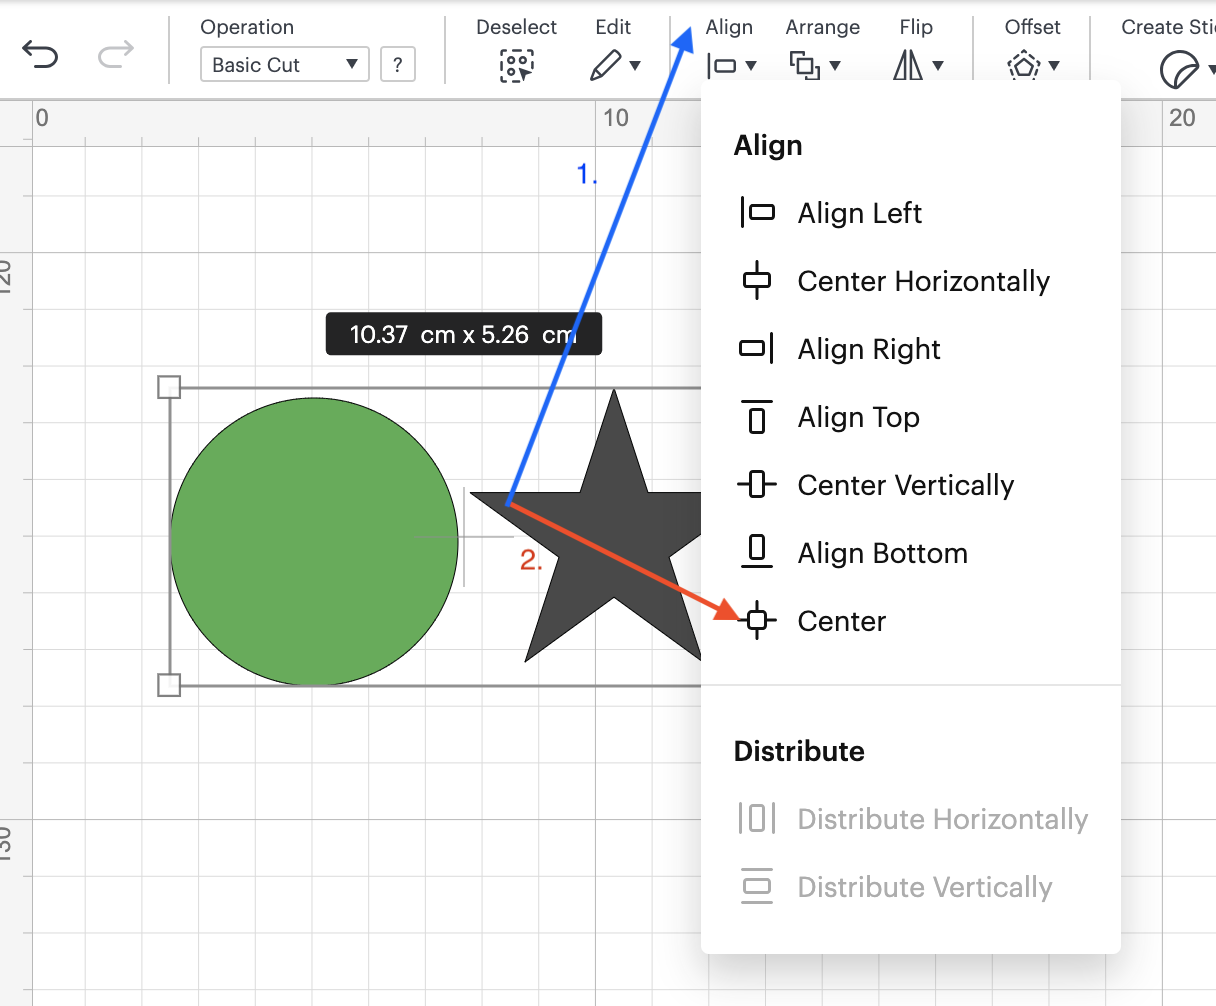
Select both and let’s align them. Click on the Align tab and that will open a drop menu. Select the center alignment.
On the right side near bottom there will be a few options.
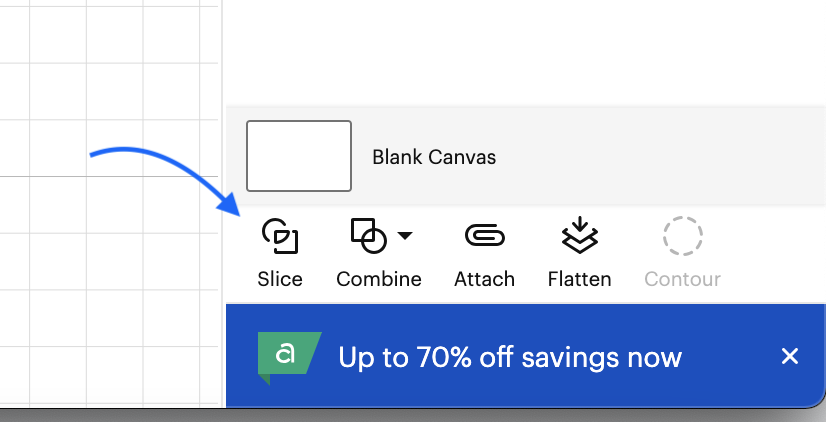
Slice – This slice selected objects. Combine – Combines selected objects. Attach – Attached all the selected work. Flatten – Flattens the select objects. Contour – Opens a detailed menu of the object that allows you to select different sections of your work. We will go into more details later on.
Images
Click on the IMAGES tab. This will prompt you to search Cricuts library. Search for something such as “cat”, “tree” or “cloud”. Make sure to check for free. Cricut offers a subscription based image library and fonts. There is a free selection to use as well.
Select your image and then click the ADD TO CANVAS button to make or customize.
Text

Click on the TEXT tab. Then type something. Along the top of the work space new options become available for text only such as FONT and FONT SIZE.
Click on the FONT tab and a new drop menu appears. By default it is on the Cricuts Fonts which some are free to use others you have to pay for. On top of the drop menu you can select SYSTEM, which has all of your fonts that are installed on your computer(which will be different for every computer.)
Where to Get Free Fonts and How to Install Them
There are thousands of these types of fonts but these three are some of the more trustworthy sites.
- Open up a web browser
- Type Font Squirrel to the search
- In Font Squirrel’s search bar type in “Star Wars”, and click search
- Click download.
- Go to the download folder and unzip the file.
- Double-click the file. This will bring up the Font Installer
- Click on Install Font.
- Go back to Design Space and select your text. Then change the font
- If you can find the new font, close Cricut Design Space and reopen it.
Assignment #1
Design a 10×10 tag with some text and images/shapes.
