Back to: Cricut & Etsy
Make Stencils with Cricut:
Vinyl Stencils
What is A Stencil?
A stencil is a thin sheet of material – usually plastic, vinyl, or paper – with a design cut out of it.
Stencils are very versatile. Here are just a few of the different types of projects you can make with stencils:
- painted wood signs
- stenciled “wallpaper” and borders
- painted floor and wall tiles
- cookies and cake decorating
- silk screen printing
- glass etching
Design the Stencil in Cricut Design Space
The first thing to do is select the image you’d like to stencil. You can choose a design from the Cricut Access Library, upload a stencil SVG file, or make your own stencil in Cricut Design Space.
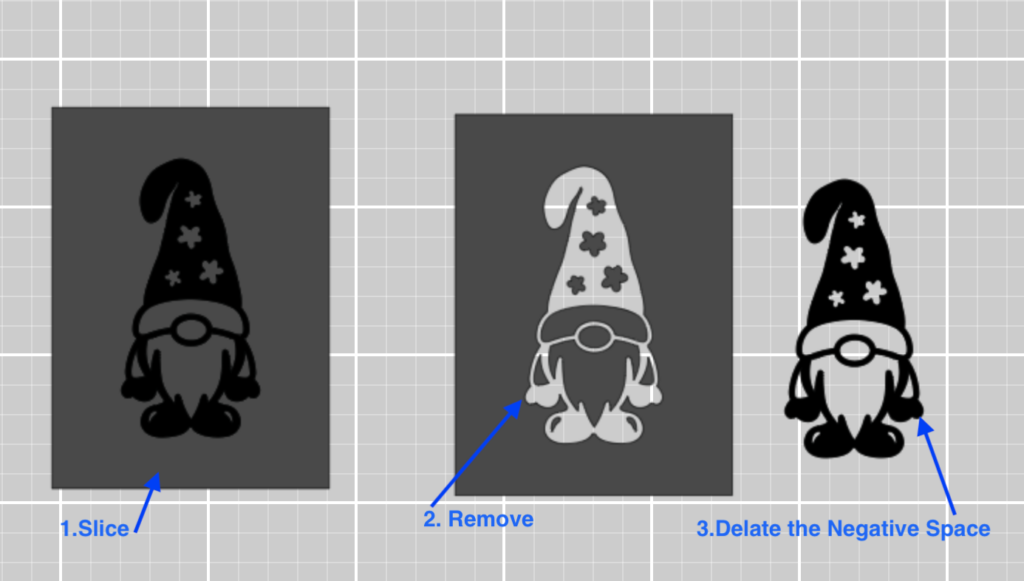
To make your own stencil use an image then create a box around it with an extra 5cm around the image then slice. Delete the middle part and cut out the box with the negative space in it.
Cut on settings for stencil vinyl then weed out the negative space. Place transfer tape over vinyl.

Cricut Settings for Cutting:
Base Material set to: Vinyl
Pressure: Default
Blade: Fine-Point Blade
Apply the Stencil
- First, make sure your project surface is clean and dry. Carefully place the stencil vinyl onto the surface. Take your time to position it exactly as you would like the final image to appear.
- Scraper tool to burnish the stencil vinyl onto the surface. Start burnishing in the center, then move out toward the edges of the image. Burnishing the edges will create a good seal and prevent your paint from bleeding under the edges
- Apply the etching cream and leave on for 3-5 mins. Be careful not to go over the edges of the stencil.
- Scrape off etching cream back into the container and rinse off glass under the sink.
- Peel off vinyl and clean glass off more.

