Back to: Cricut & Etsy
Table Of Contents
UPLOAD STEPS:
In this lesson we will go over how to upload an image in Cricut Design Space.
- Open Design Space
- Start a “New Project”
- On the left side of your canvas click “Upload”
- This will take to a new menu where your previous images are uploaded
- Click on “Upload Image”
- Takes you to a new menu asking your where is the image located
- Click “Browse”
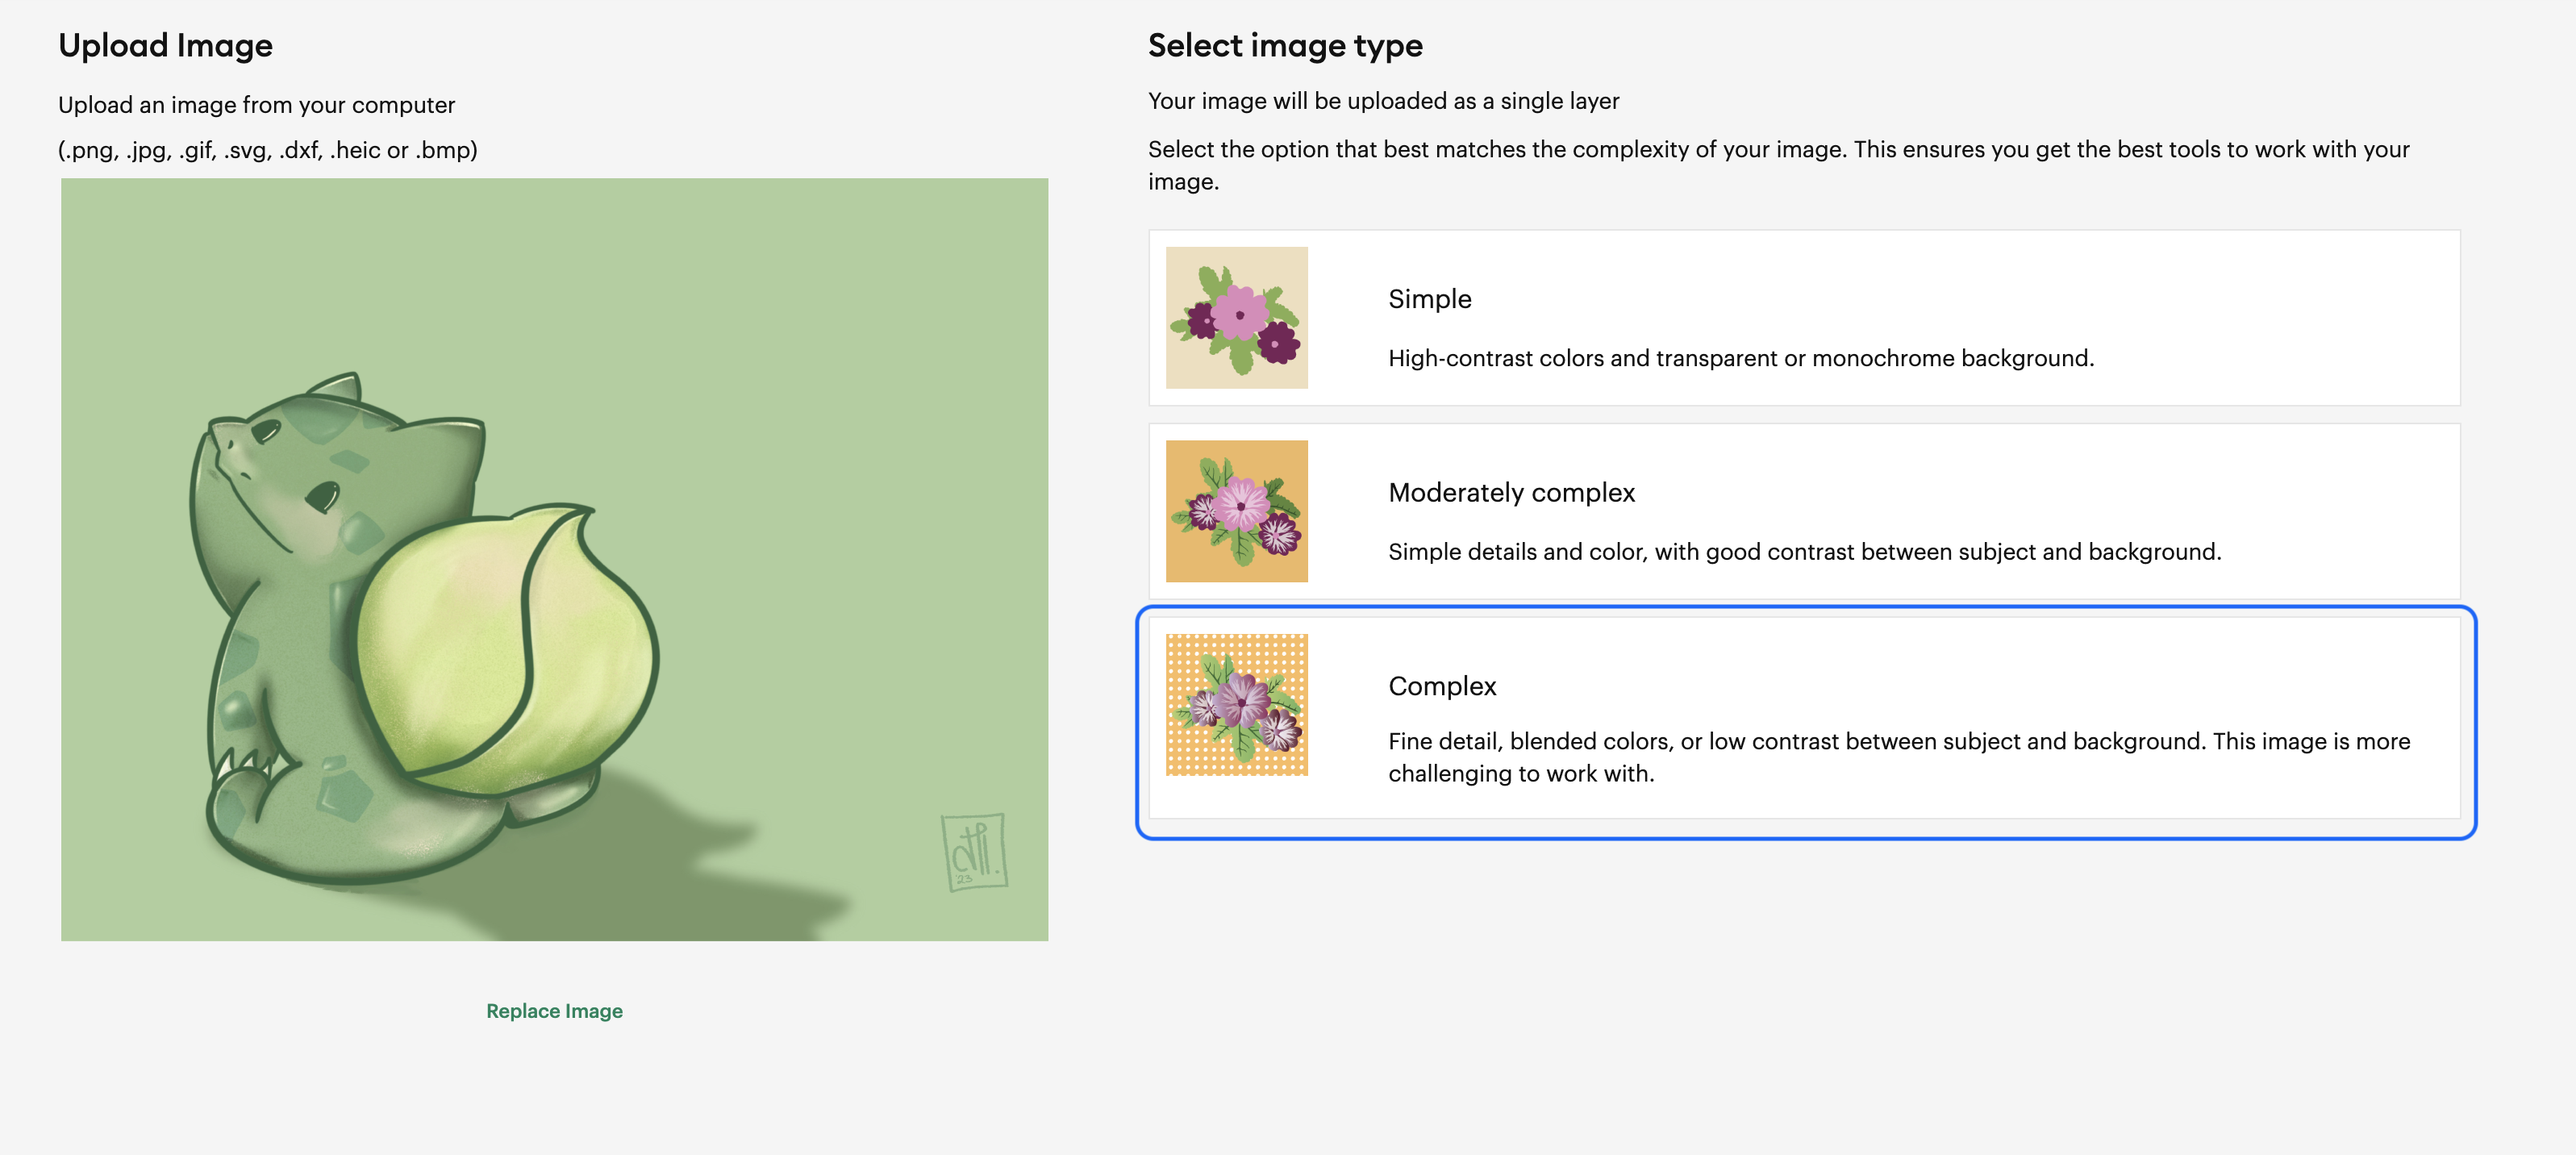
- Locate your image and click “Open”
- Click “Complex” for the Image Type

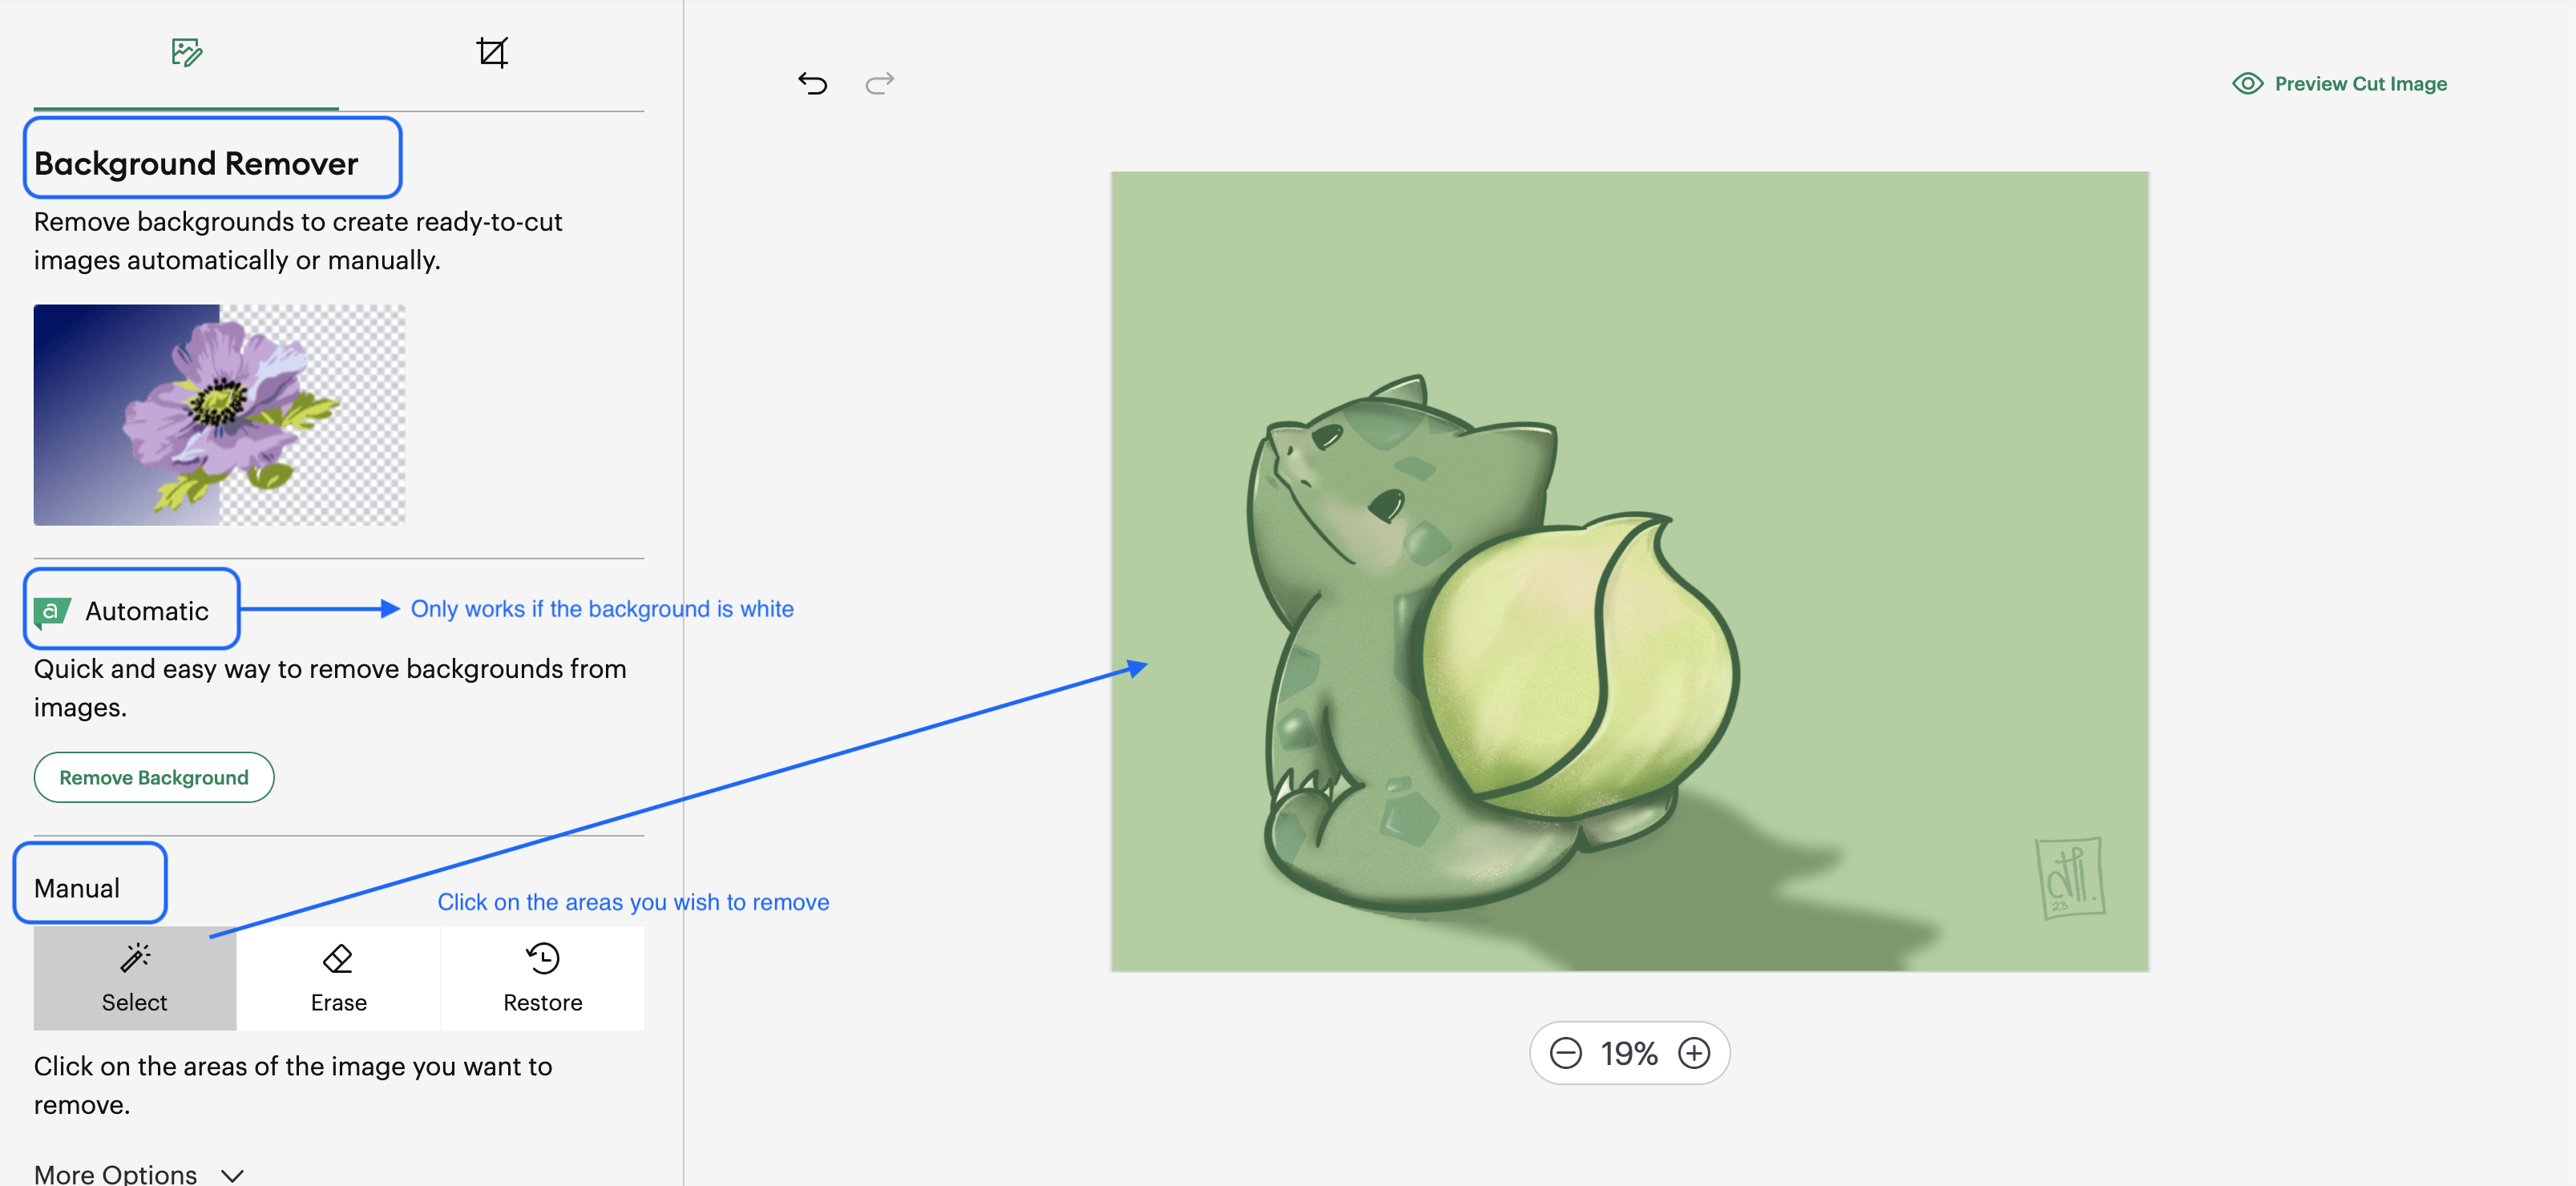
To Remove Background:
- If your image has a white background, the Automatic Background option is the quickest way to prepare your image. However…
- If there is white in your design you want to keep or your image is low quality then Manual is the better tool
- Click on the areas you wish to remove.
- Other tools are the Erase and Crop.
- Once you are satisfied with your image click “Apply and Continue”
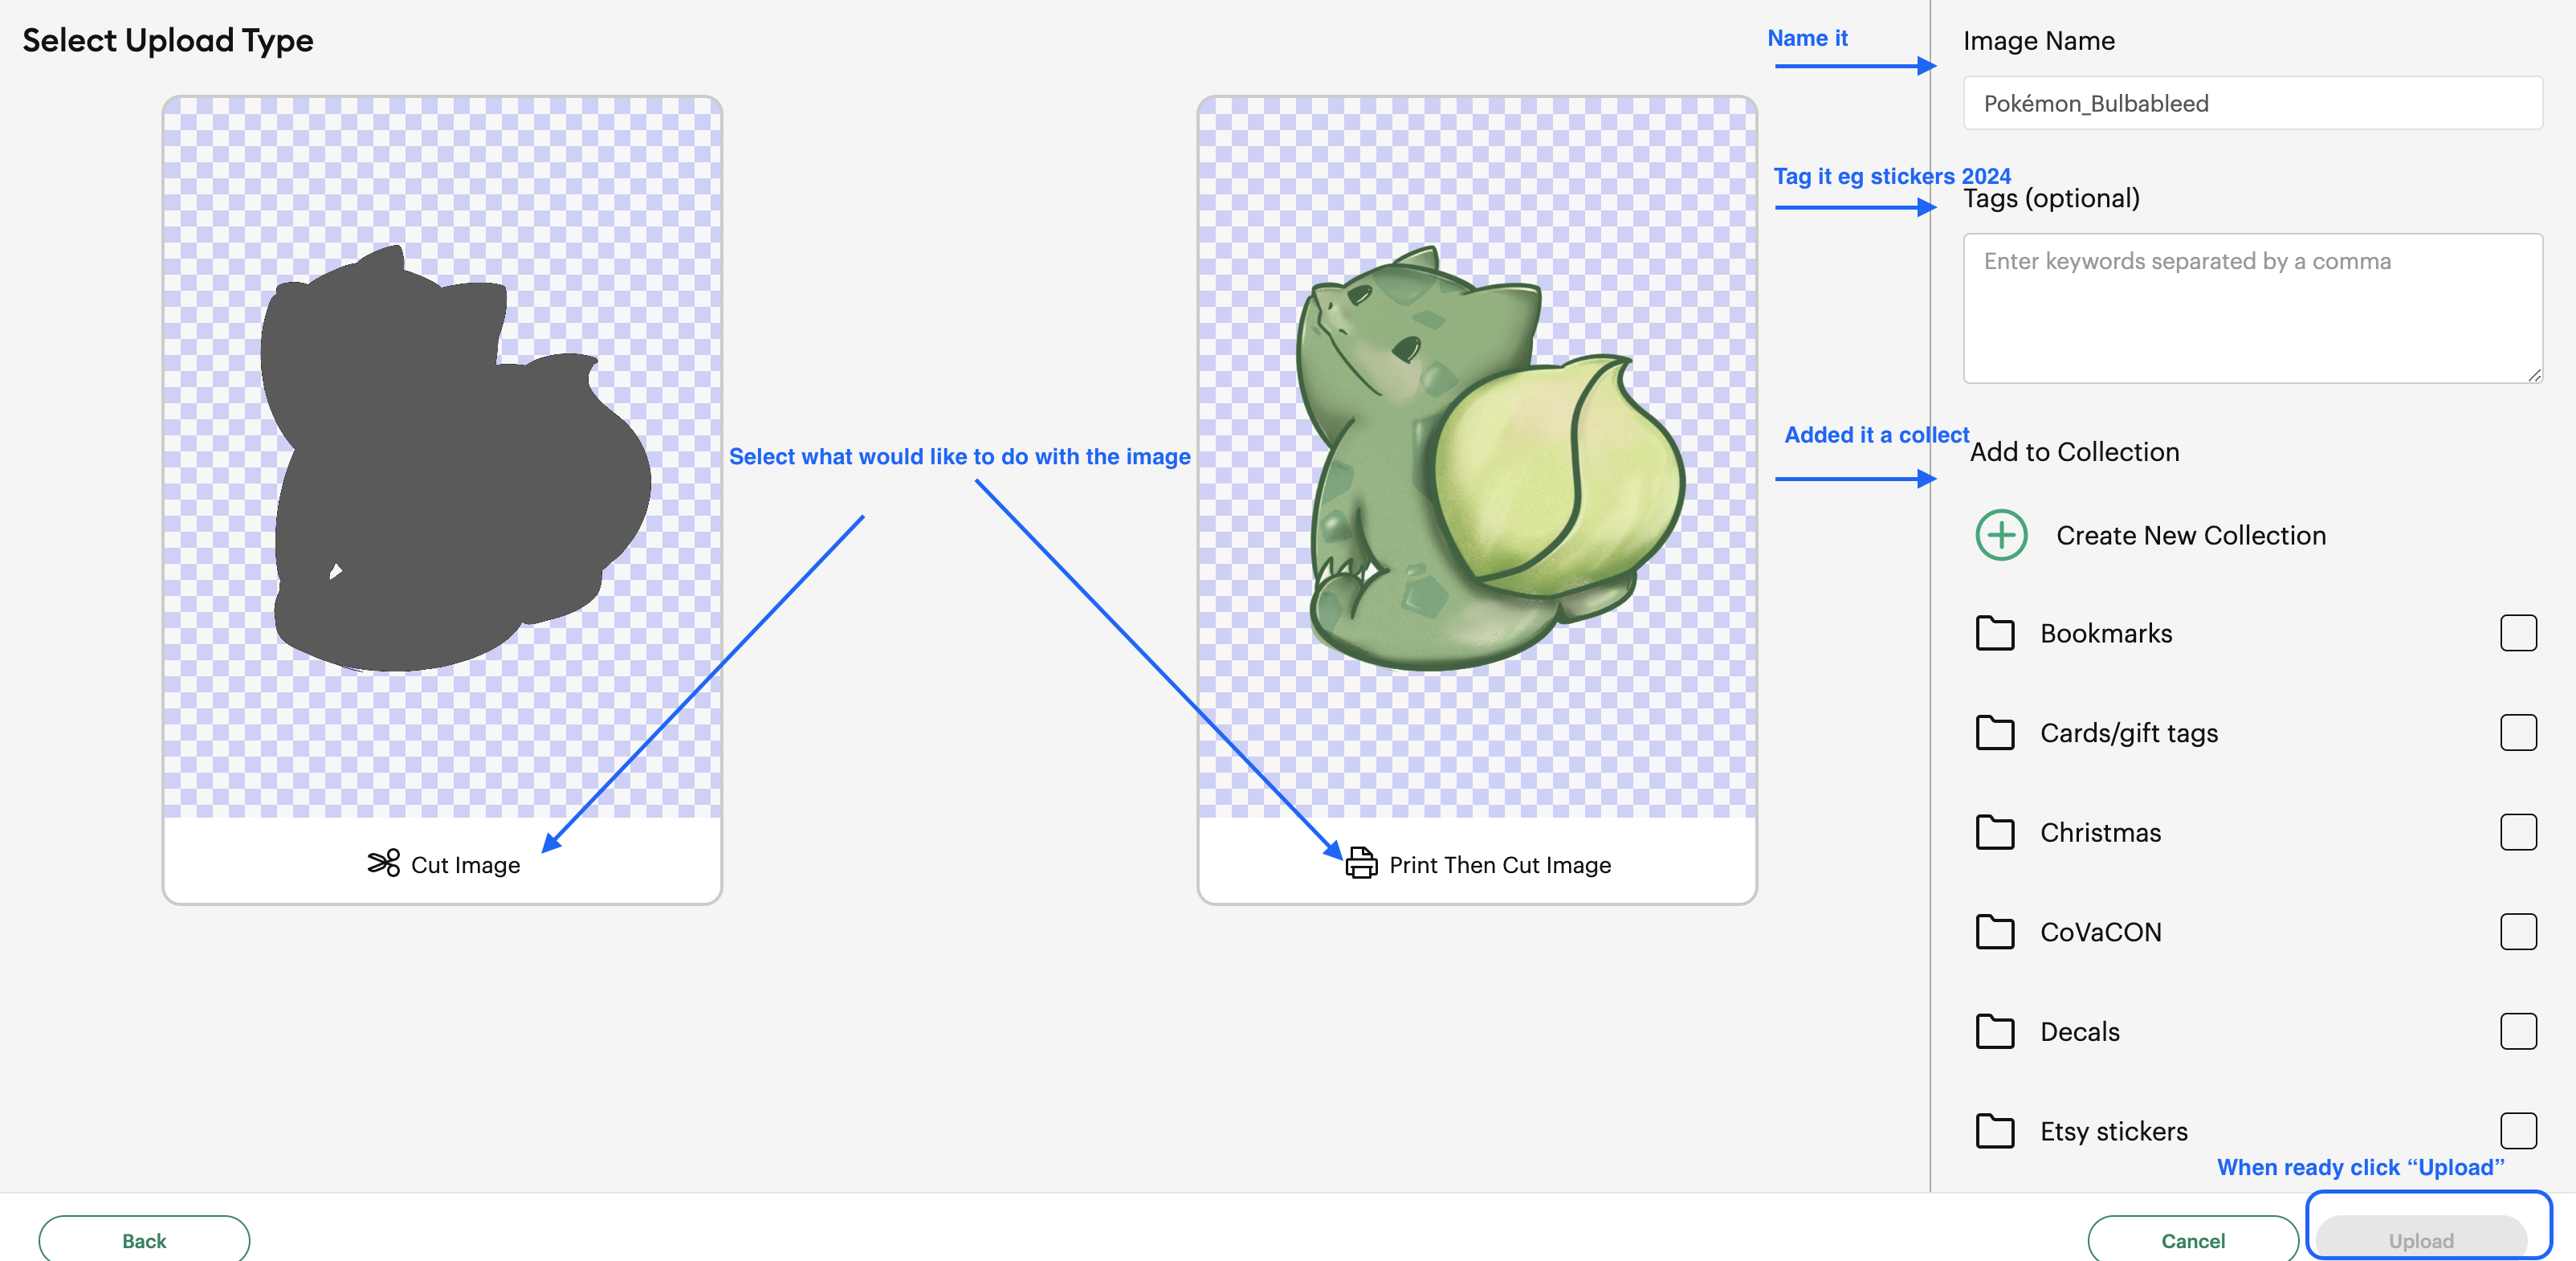
- Select either “Cut” or “Print and Cut” Option
- Name your image and click “Upload”
- This takes to where all of your uploaded images are. By default they are sort by “Recent Uploads”
- Select the image you want and click “Add to Canvas”
Once the image is added to your canvas you can edit it such as scaling it or rotate it. You can also add more images to the canvas.